My notes on Angular (Redux 14)
I was going over my Angular post back in 2017, My notes on Angular (2.0+), and thought I should provide code examples from my Angular product catalog application demo that you can check out here with the full source code here.
This post can serve as a quick refresher to the basic concepts we need to know to build a full running Angular application.
I do think that these are the concepts that you can easily transfer to any modern front-end framework especially any web component based framework.
Without further ado, let’s get down to it…
Root module
Following Angular’s default directory structure, our root module would be in /src/app/app.module.ts:
@NgModule({
  declarations: [
    AppComponent,
  ],
  bootstrap: [AppComponent]
})
export class AppModule { }
What this code does is export a class named AppModule and decorate it with Angular directive @NgModule to indicate that this is an Angular module.
In /src/main.ts, our AppModule is loaded at startup via call to bootstrapModule():
platformBrowserDynamic().bootstrapModule(AppModule)
  .catch(err => console.error(err));
We also declare in our root module our root component AppComponent via the declarations property and we set it to load at startup via the bootstrap property. Note that the declarations property is where you declare all Angular components that an Angular module requires.
Root component
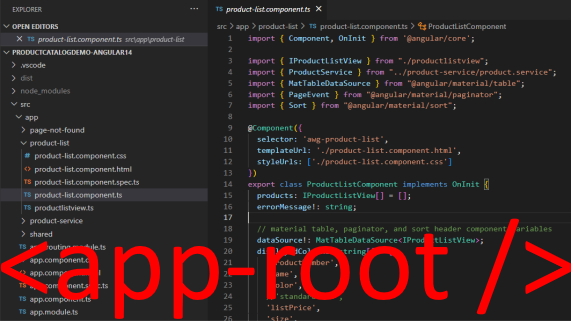
Our root component would be in /src/app/app.component.ts:
@Component({
  selector: 'app-root',
  templateUrl: './app.component.html',
  styleUrls: ['./app.component.css']
})
export class AppComponent {
  title = 'productcatalogdemo-angular14';
}
What this code does is export a class named AppComponent with a property title and decorate the class with Angular directive @Component to indicate that this is an Angular component.
An Angular component is where we define our HTML and CSS, the UI for our application, and also the custom HTML tag name which in this case is <app-root>. Note that this follows the concept of Web Components.
If we look at the /src/index.html file of our Angular application, the <app-root> is added under the <body> tag:
<body>
  <app-root></app-root>
</body>
</html>
Note that I loosely called it root component because this will be the only entry point to our Angular application. But we can have multiple entries if we declare and boostrap more than one component in our root module and add them in the index.html file. See The bootstrap array for more info.
Interpolation
Interpolation is a way to embed values or expressions in an Angular component template. It uses the double curly braces {{ and }} as delimiters.
Remember in our root component class AppComponent we defined a property called title? We can embed this property inside the the component’s template in /src/app/app.component.html:
<div>{{ title }}</div>
Template Variable
There is also such thing as template variable in Angular which we don’t have an example in our Angular application. Basically you can assign a variable to any HTML element (.e.g input, div, or even our own custom element) in a template using the hash symbol # and refer to it from another part of the template.
Property binding
Good examples of property binding can be found in our ProductListComponent’s template in /src/app/product-list/product-list.component.html:
<mat-paginator
  [length]="totalRecords"
  [pageSize]="pageSize"
  [pageSizeOptions]="pageSizeOptions"
  [pageIndex]="page-1"
  (page)="pageEvent($event)">
</mat-paginator>
Here we are setting the value of the length attribute, among other things, of <mat-paginator>. Basically we enclose the attribute with the square brackets [ and ]:
[length]="totalRecords"
to bind it to the value of totalRecords where totalRecords is a property in our ProductListComponent in /src/app/product-list/product-list.component.ts.
Event binding
Similarly for event binding, we enclose the event attribute, in this case the page event attribute in our code example above, with the parentheses ( and ):
(page)="pageEvent($event)"
to bind it to the function pageEvent() defined in our ProductListComponent. $event is Angular’s event object that we need to pass to the function.
Two-way binding
We don’t have an example of two-way binding in our Angular application. One thing to note is that when doing two-way binding with form elements, the built-in attribute directive NgModel is used instead.
So let’s say we have a form for editing our product in our catalog and to allow editing a product’s name we can use two-way binding on an <input> element:
<input type="text" [(ngModel)]="product.Name">
, where product is an object defined in our product component and Name is one of product’s properties.
With two-way binding, we enclose the attribute with [( and )].
Built-in attribute directives
We also don’t have examples of built-in attribute directives in our Angular application. But one such attribute is the NgModel mentioned above. The other commonly used ones are: NgClass and NgStyle.
Built-in structural directives
Our ProductListComponent’s template in /src/app/product-list/product-list.component.html has examples of some of Angular’s built-in structural directives.
One such built-in structural directive is *ngIf:
<mat-progress-spinner
  style="margin-left: 10px;"
  *ngIf="!productsLoaded"
  mode="indeterminate"
  diameter="25">
</mat-progress-spinner>
The *ngIf directive here tells Angular to display or render the <mat-progress-spinner> component if products have not been loaded yet or has not finished loading yet. Note that productsLoaded is a property of our ProductListComponent in /src/app/product-list/product-list.component.ts.
Another commonly used built-in structural directive is the *ngFor:
<div *ngFor="let product of products">
  <mat-card>
    <mat-card-content>
      <p>
        {{product.ProductNumber}}
        | {{product.ProductCategory}}
        | {{product.ProductModel}}
        | {{product.Color}}
        | Sz {{product.Size}}
        | Wt {{product.Weight}}
      </p>
    </mat-card-content>
  </mat-card>
</div>
The *ngFor directive iterates/loops over the containing HTML code, and in our example above, it iterates for each product in the products propery of our ProductListComponent and displays a <mat-card-content> component showing each product’s informations such as ProductNumber, ProductCategory, etc.
Pipes
We use the character | to indicate a pipe operation in Angular. In our ProductListComponent’s template, the CurrencyPipe is used to display all dollar amount values to currency format:
<mat-card-subtitle>{{product.ListPrice | currency}}</mat-card-subtitle>
Parent to child component interaction
We don’t have an example of passing data from parent component to child component in our Angular application. But let’s say we decided to create our own card component for our single product named <product-card> and we wanted to iterate over them, we could have the following modified template on our ProductListComponent’s template:
<div *ngFor="let product of products">
  <product-card [product]="product"></product-card>
</div>
, where we are binding the product attribute of the the <product-card> to the iterated products of our *ngFor directive.
To add the product attribute to our ProductCard component, we use the @Input decorator:
@Component({
  selector: 'product-card',
  templateUrl: './product-card.component.html',
  styleUrls: ['./product-card.component.css']
})
export class ProductCard {
  @Input() product: Product = {};
}
This is like passing a custom property to our component.
Child to parent component interaction
To pass data or information back to parent from a child component, we use EventEmmitter in Angular to expose an event from child that the parent can listen to. To define an event, we use the @Output decorator.
For example, if we wanted to have a list of liked products in our product list page (our parent component) and everytime the Like button is clicked in our product card component (our child component), we would use the @Output decorator to define our EventEmitter.
Back to our ProductCard component (our child component), we would add the @Output statement and the code to emit the event:
export class ProductCard {
  @Output() likedEventEmitter = new EventEmitter<Product>();

  likeButtonClicked(product: Product) {
    this.likedEventEmitter.emit(product);
  }
}
Then on our ProductListComponent’s template (our parent component), we listen to the event emitted by our child component using event binding:
<div *ngFor="let product of products">
  <product-card
    [product]="product"
    (likedEventEmitter)="addLikedProduct($event)">
  </product-card>
</div>
, where addLikedProduct() is a function defined in our ProductListComponent.
Lifecycle hooks
You will notice in our ProductListComponent in /src/app/product-list/product-list.component.ts in its declaration that it’s implementing an interface called OnInit:
export class ProductListComponent implements OnInit {
That is to say we would like our component to implement the ngOnInit() method:
  ngOnInit(): void {
    this.getProducts(); // load products on load
  }
}
ngOnInit() is one of the most common lifecycle hooks available in Angular that we can use. Other commons ones are: ngOnChanges() and ngOnDestroy().
Service
Angular service is a way to separate logic from view, from Angular component. It is decorated as @Injectable, declared in Angular module as a provider, and injected to an Angular component.
An example of an Angular service in our Angular application is the ProductService in /src/app/product-service/product.service.ts:
@Injectable()
export class ProductService {
  async getProducts(...) {
    ...
  }

  orderBy(...) {
    ...
  }
}
In our AppModule in /src/app/app.module.ts we list our ProductService as a provider via the providers property:
@NgModule({
  declarations: [
    AppComponent,
    ProductListComponent,
  ],
  providers: [ProductService],
  bootstrap: [AppComponent]
})
export class AppModule { }
Then our ProductService is injected to the ProductListComponent’s constructor in /src/app/product-list/product-list.component.ts so our product list component can call functions of our product service such as getProducts().
export class ProductListComponent{
  constructor(private _productService: ProductService) { }

  ...
   this._productService.getProducts(...);
}
Routing
Routing enables us to build a single page application where you can navigate from one view to the next without requesting a whole new page from the server. The Angular router provides us such feature.
We have routing in our Angular application and they are defined in the routing module in /src/app/app-routing.module.ts:
import { RouterModule, Routes } from '@angular/router';

const routes: Routes = [
  { path: 'products', component: ProductListComponent },
  { path: '**', component: PageNotFoundComponent }
];

@NgModule({
  imports: [RouterModule.forRoot(routes, { useHash: false })],
  exports: [RouterModule]
})
export class AppRoutingModule { }
The variable routes contains our route definitions and basically we are saying that for any url path (including the base path '/') other than /products we show the Page Not Found component, as indicated by the wildcard route '**'. Only the url path /products will show our product list component, our Angular product catalog application.
The routed view is then shown on the template of our root component AppComponent in /src/app/app.component.html. In Angular, the routed views render in the <router-outlet>.
<div style="padding:20px">
  <router-outlet></router-outlet>
</div>
Forms
We don’t have forms on our Angular application. But if you are having forms in you web application, you have the option to use Angular forms. Maybe I will do a separate post on this when I add forms in our Angular application. But for now just be aware that in Angular, there are two approaches to implementing forms: the more simplistic template-driven forms and the more robust and scalable reactive forms.
Additional Reference
There is this Youtube video that I watched (here is the link) that goes through these concepts. It’s a long video, like 4 hours, but it’s totally worth it. For just a quick refresher you can set the playback to 2x which I totally did and still understandable.